
Homemade croissants. Not something that every home cook (or cooks) would try to make. However, we are not your ordinary home cooks, and thus the 24 hour adventure of making croissants began...We followed a very scary Cooks Illustrated recipe (it was 3 pages long) word for word as we navigated the process.
(Note: the measurements (yes, measurements) are not to be taken lightly. You will need at least two rulers to complete the croissant making process. This was by far the most precise project we have ever attempted.)

First - the ingredients. Croissants do not require much, just flour and butter (mostly) though, special varieties are encouraged. European butter has a much higher fat content (and as such is much more delicious) and high protein flour makes the dough easier to work with throughout the process. A small amount of milk, rapid rise yeast, a bit of sugar and 2 teaspoons of salt round out the dough.

Melt three tablespoons of butter in a small saucepan over low heat.

Measure 1 3/4 C whole milk and add to the melted butter, removing from heat immediately.

Whisk together thoroughly.

Add four teaspoons of rapid rise yeast to the mixture. Dump the mixture into the bowl of a stand mixer with the dough hook attachment ready to go. Add 4 1/4 cups of flour, two teaspoons of salt and a fourth cup of sugar.

Mix on low speed for 2-3 minutes, then on high for 1 minute.

Turn dough out onto lightly floured clean counter top.

Wrap tightly in plastic and let rest for 30 minutes at room temperature.

After the 30 minutes, shape dough into a 10"x7" rectangle about 1" thick on parchment paper. Wrap tightly in parchment paper and plastic wrap, refrigerate for two hours.

While the dough is chilling, prepare the envelope for the butter block (that's right, a butter block). Take a 24" long piece of parchment paper and fold in half to create a 12" rectangle.

Fold over open sides of rectangle to create an 8" square.

Enjoy the crafty side of croissant making, but don't forget to be precise, rulers (or industrial measuring tapes) are very helpful.

Place 3 sticks of very cold butter on a lightly floured counter. We used two sticks of regular (Kroger brand, even) style butter, and one stick of Plugra, a European style butter for each batch. Yes, we made two batches (totally worth it!).

Beat (yes, beat) the butter with a rolling pin for about 60 seconds, until it is well incorporated. You will need to rotate the butter several times to ensure that it is one mass. Ultimately, you would like a rough 6" square.

Unfold the parchment envelope and place butter inside. Fold the paper back just as you had it (creases are helpful) and flip so the flaps are on the bottom. Roll out gently until the butter completely fills the envelope.

Make sure to fill the corners and have even thickness.

Yes, this really works, and might be the coolest thing ever. Place butter block in the fridge for at least 45 minutes.

After the dough has chilled for at least two hours in the fridge, and 30 minutes in the freezer, remove it from the wrappings and turn onto a lightly floured counter. Roll gently into a 17"x8" rectangle.

Place the butter block (unwrapped) in the center of the dough.

Fold each side of the dough in so they meet in the middle on top of the butter.

Goal: evenly spaced.

Pinch together the seam you have just created with your fingers.
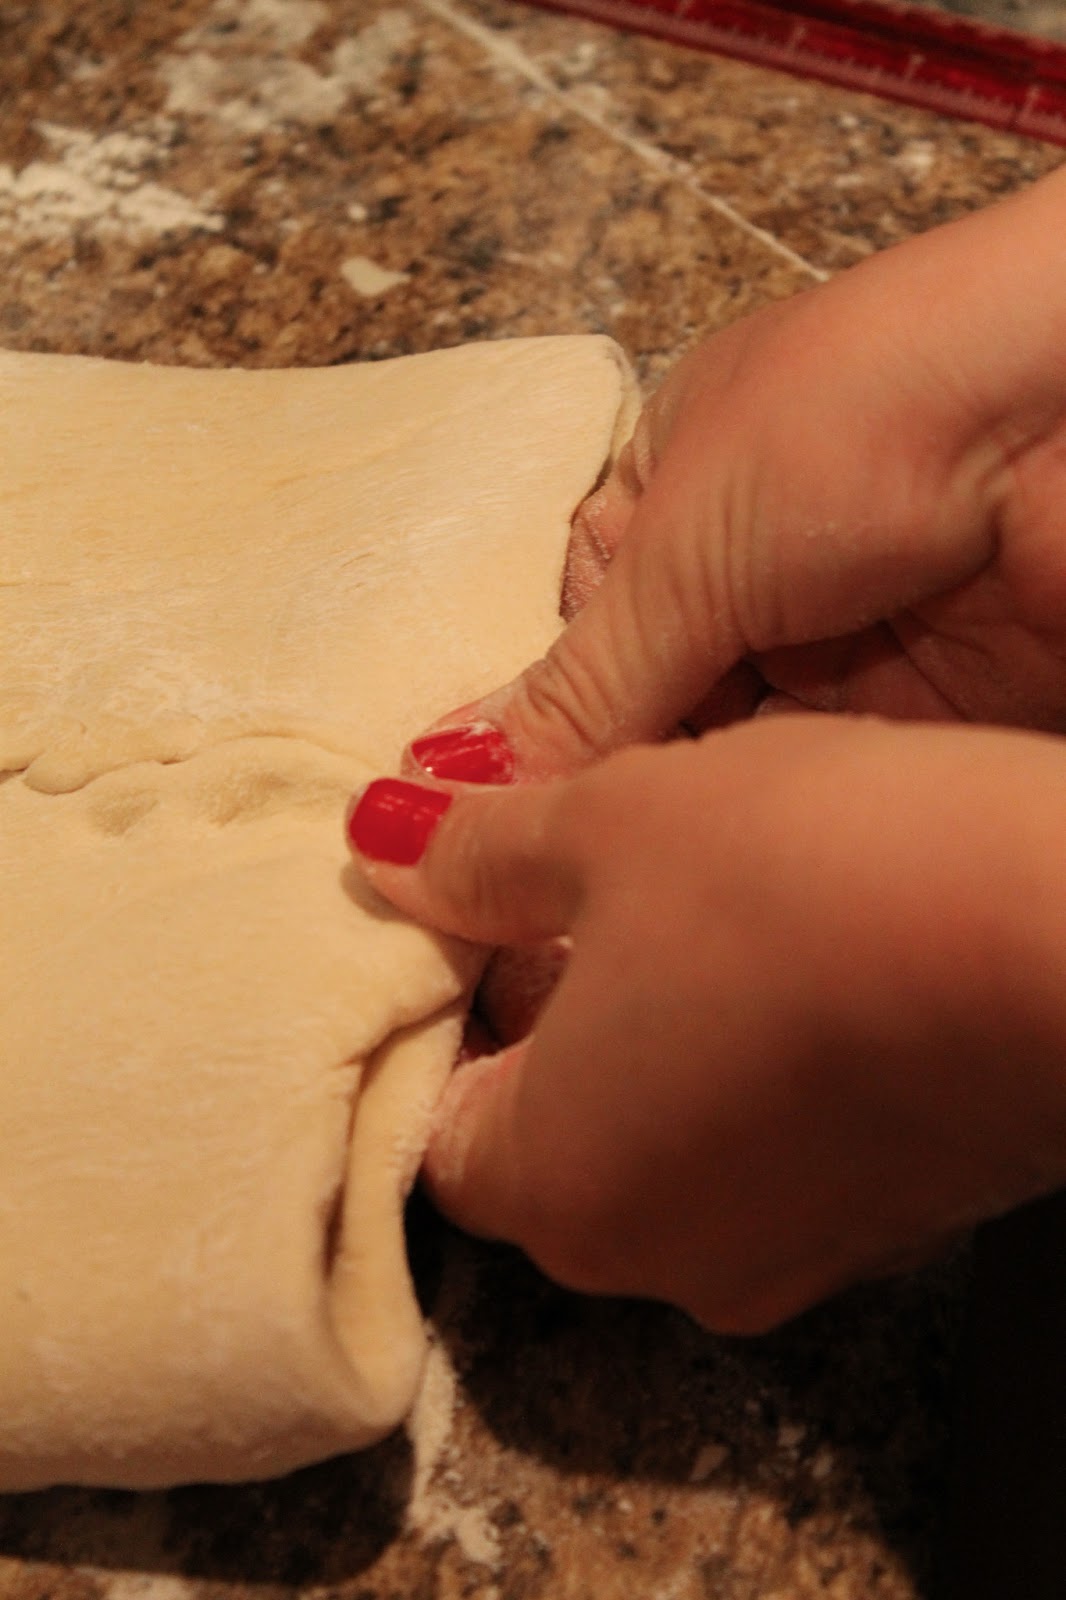
Pinch together the open ends as well. You can also press down with a rolling pin to ensure this is sealed. Roll out into a 24"x8" rectangle.

Fold into thirds, like a business letter. Left over right. Tightly wrap in plastic and put in freezer for 30 minutes. Repeat, being sure to freeze in between to avoid sticky dough. At this point, the dough can stay in the fridge for 2 to 24 hours. When you are ready to use it, freeze it for 30 minutes beforehand. (This is a great place to take a break, for sleeping, eating, drinks with friends, whatever will get you through the next 12 hours...)

After removing the dough from the freezer, roll into an 18"x16" rectangle. This is the most challenging part of the whole process.

Use your rulers to ensure appropriate size (this will be very important when you are cutting your croissants for rolling).

Fold the top 8" of the dough over the bottom half. Mark dough at 3" intervals along the bottom edge with a bench scraper or pizza cutter. Measure 1.5" in from the top left, make a mark, then measure 3" intervals across the top from that mark.

Using a sharp knife or pizza cutter, cut dough from mark to mark to cut on a diagonal.

This will create triangles that will be rolled into your croissants.

Separate the dough triangles from each other, making sure to cut those that are diamond shapes into triangles.

Cut a 1/2" slit into the bottom half of each triangle. Stretch each side of that slit gently.

Gently roll each triangle from wide end to narrow end. (How cute are Janae's fingernails??) This is the time to add chocolate chips if you like.

Continue to roll the dough toward the tip, stretching the dough as you go.

Shape into a crescent, with the ends tucked toward the center.

Admire your perfect (and completely homemade) croissant.

Place on a cookie sheet covered in parchment paper approximately 2.5" apart.

Loosely cover with plastic and allow the dough to rise at least two hours at room temperature. Preheat oven to 425 degrees. In a small bowl, whisk together 1 egg, a teaspoon of water and a pinch of salt. Lightly brush each croissant with egg wash.

Place croissants in oven and reduce temperature to 350 degrees. Bake 12 minutes, rotate the pan, and bake for an additional 6 minutes.

If you can stand it, let them cool just slightly and serve warm.


